 iVIGA Faucet Online Shop

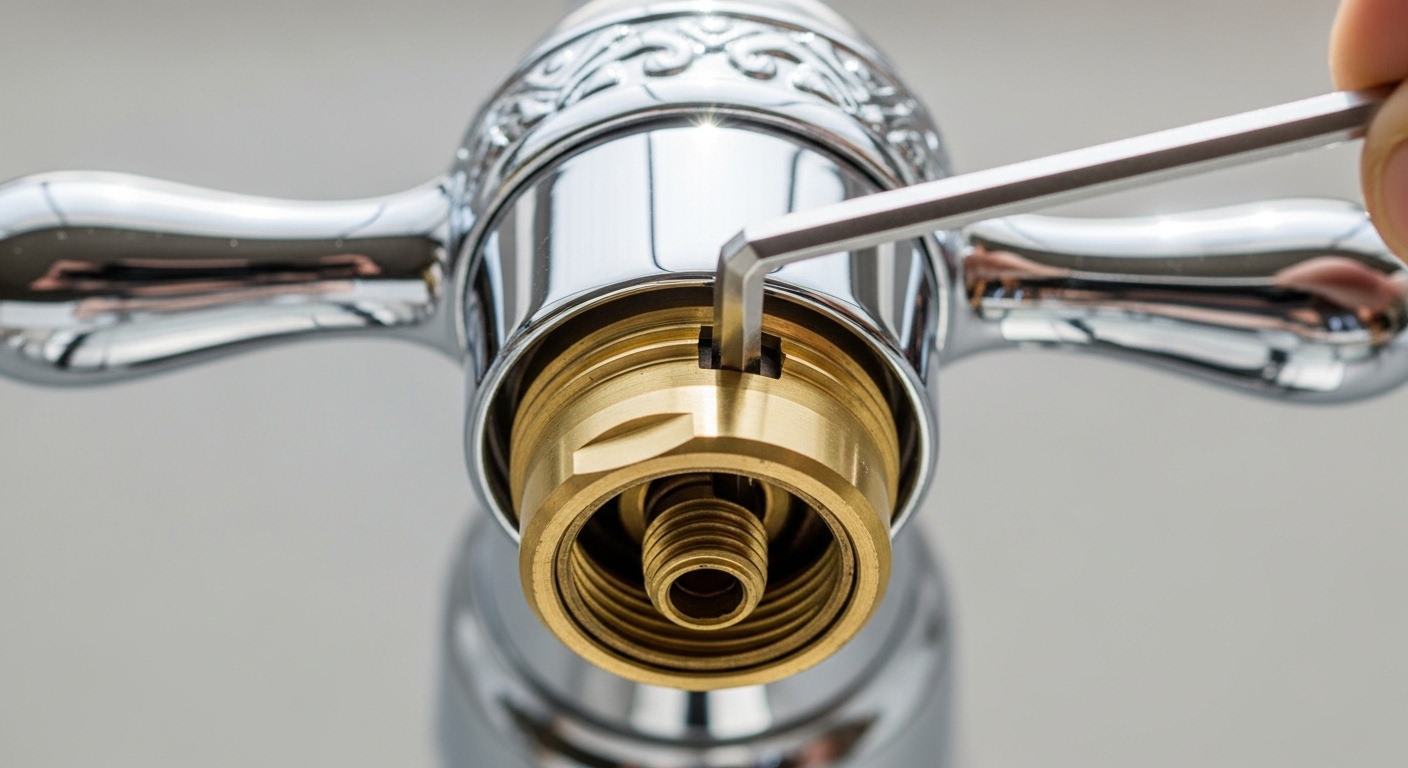
Learning how to replace bath faucet handle hardware is one of the most cost-effective bathroom upgrades you can tackle in an afternoon. Whether your handle is wobbling, cracked, stripped at the broach, or simply outdated in finish, swapping it out doesn’t require a plumber, a permit, or specialty tools. With the right replacement part and 20–30 minutes, you’ll restore the smooth feel and clean look of your tub or shower without touching the valve body, the cartridge, or the in-wall plumbing.
This guide walks you through every step — from identifying your faucet’s brand and stem profile, to pulling a stuck handle without damaging the escutcheon, to torquing the new one to the right tension. We’ll also cover the common mistakes that turn a 20-minute job into a weekend project, the right replacement parts to buy, and what to do if your handle won’t budge after years of mineral buildup.
Why Learning How to Replace Bath Faucet Handle Hardware Matters
A loose, leaking, or cosmetically tired handle isn’t just an aesthetic problem. A wobbly handle puts uneven pressure on the cartridge stem, which accelerates wear on the internal seals and can lead to drips, temperature drift, and eventually a full valve replacement. Catching the issue early — and swapping the handle before it damages the stem — saves you the much larger cost of cutting into a tile wall to replace a cartridge or valve body.
There’s also a finish consideration. Bath faucet handles take more abuse than almost any other fixture in your home: wet hands, soap scum, hard water spots, and the occasional accidental knock from a shampoo bottle. Even premium PVD coatings will eventually show wear in high-touch areas, and a fresh handle is often the single most visible upgrade you can make to a dated tub. If you’re also seeing pitting or corrosion on the spout, you may want to read our guide on what causes rust on faucets and how to remove it before deciding whether a handle swap is enough.
Common Reasons People Replace a Bath Faucet Handle
- Wobble or play: The handle moves up, down, or side-to-side even when locked in position — usually a stripped broach (the splined hole that grips the stem).
- Cracked or chipped: Plastic handles and lower-quality zinc alloy handles crack at the set screw boss after years of torque cycles.
- Finish failure: Chrome peeling, brushed nickel flaking, or matte black turning glossy in worn spots.
- Style refresh: Swapping a lever for a cross-handle or upgrading from polished chrome to matte black or brushed gold.
- Hard-to-turn operation: Sometimes a stiff handle just needs a new design with better leverage, especially for elderly users or kids.
- ADA or child-proofing upgrades: Switching to a lever for easier grip, or to a temperature-limited handle for kids’ bathrooms.
Tools and Materials You’ll Need
One of the best things about this repair is the minimal tool list. Most homeowners already own everything required. Here’s the full kit:
- Allen wrench set (metric and SAE — bath faucets vary by brand)
- Phillips and flat-head screwdrivers
- Needle-nose pliers (for stubborn decorative caps)
- Plumber’s grease (silicone-based, NSF-61 rated)
- White vinegar or CLR (for dissolving mineral buildup on stuck handles)
- Soft cloth or microfiber towel (to protect the finish)
- Painter’s tape (to mark the handle’s resting position)
- Replacement handle kit — brand- and model-specific
- Optional: handle puller tool (for handles seized to the stem)
The single most important item on this list is the correct replacement handle. Bath faucet stems use different broach patterns — Moen’s 1222 cartridge stem is different from Delta’s RP19804, which is different from Pfister’s, Kohler’s GP series, or Iviga’s universal cartridge. Buying a “looks-similar” handle from a big-box bin almost always results in a return trip. Pull your old handle first, photograph the stem broach, and match it to the manufacturer’s parts diagram.
How to Replace Bath Faucet Handle Hardware: Step-by-Step
Step 1: Shut Off the Water (Optional but Smart)
For a handle-only swap where you’re not touching the cartridge, you technically don’t need to kill the water — the valve stem stays sealed. But if your handle is seized and you anticipate having to wrestle with it, shut off the supply at the home’s main valve or at the dedicated tub shutoffs (if your installation includes them behind an access panel). It takes 30 seconds and protects you from an accidental geyser if you slip and bump the stem.
Step 2: Mark the Handle’s “Off” Position
Before you remove anything, take a strip of painter’s tape and mark exactly where the handle sits when fully off. This becomes your reference point when installing the new handle — install it in the wrong orientation, and “off” becomes 45 degrees rotated, which is confusing and can lead to scalding if hot is now where cold used to be.
Step 3: Remove the Decorative Index Cap
Almost every modern bath faucet handle has a small decorative cap — usually marked with a red/blue temperature index or the brand logo — that covers the set screw. Use a fingernail, a flat-head screwdriver wrapped in tape, or a thin plastic spudger to gently pry it off. Pry from the edge, not the center, and work slowly. A scratched escutcheon will haunt you every time you take a bath.
Step 4: Loosen the Set Screw
Under the cap you’ll find either a Phillips screw or, more commonly, a recessed Allen (hex) set screw. Insert the correct-size Allen wrench and turn counterclockwise. You don’t need to remove the screw completely — just back it out far enough that the handle slides off the stem. Removing it fully often means dropping it down the drain, so back it out two or three turns and stop.
Step 5: Pull the Handle Off the Stem
With the set screw loose, the handle should slide straight off the cartridge stem. Should. In reality, after 5–15 years of hard water, the handle is often welded to the stem by mineral deposits. If it won’t budge:
- Wrap a hot, vinegar-soaked rag around the base of the handle for 10–15 minutes to dissolve calcium and lime.
- Wiggle the handle gently side-to-side while pulling straight out — never twist hard, as you’ll snap the stem.
- If still stuck, use a dedicated handle puller (a $15 tool from any hardware store) that grips the handle base and presses against the stem to pop it loose without damage.
- As a last resort, carefully tap the underside of the handle with a rubber mallet while applying outward pressure.
If your old handle felt wobbly or off-center even before removal, the underlying issue might not be the handle at all. Our deep-dive on why faucet handles are misaligned and how to fix them explains the half-dozen root causes — including worn cartridge splines that may need addressing during your handle swap.
Step 6: Inspect the Stem and Cartridge
With the handle off, you have a rare opportunity to inspect the valve internals. Look for:
- Stem splines: Should be sharp and undamaged. Rounded or stripped splines mean the new handle won’t grip — replace the cartridge before installing a new handle.
- Stem corrosion: Green or white buildup wipes off with vinegar; deep pitting means cartridge replacement.
- Weep holes: A wet stem when the water is off indicates a failed cartridge seal — also a cartridge replacement situation.
If you spot a stem that’s spinning freely with no resistance, or you hear a hissing sound, you’re looking at a cartridge issue rather than a handle issue. Our guide on how to diagnose a faulty faucet cartridge walks you through the next steps.
Step 7: Clean the Stem Thoroughly
Wipe the stem and the surrounding escutcheon with a vinegar-dampened cloth. Remove every trace of mineral buildup, old grease, and grit. A clean stem ensures the new handle seats fully and that the set screw bites cleanly into the flat. Skipping this step is the number-one reason new handles wobble within months of installation.
Step 8: Apply a Thin Coat of Plumber’s Grease
Dab a pea-sized amount of NSF-61 silicone grease onto the stem splines. This does two things: it makes future handle removal painless, and it provides a microscopic seal that keeps moisture and minerals out of the broach. Don’t overdo it — too much grease attracts grit. A thin, even film is perfect.
Step 9: Install the New Handle
Slide the new handle onto the stem, aligning it with the “off” position you marked in Step 2. Push it on firmly — it should seat fully against the escutcheon with no gap. Insert and tighten the set screw with the Allen wrench. Snug it firmly but don’t crank with full body weight — over-torquing strips the threads or cracks the handle’s set-screw boss.
Step 10: Test, Then Replace the Index Cap
Turn the water back on and cycle the handle through its full range — off, cold, warm, hot, and back. Check for wobble, smooth operation, and proper “off” position. If everything looks good, snap the decorative cap back into place. You’re done.
If you notice the faucet starts dripping after this swap — even though you didn’t touch the cartridge — it’s worth reading why your faucet drips after replacement (and how to fix it). Sometimes the act of removing a stuck handle disturbs an aging cartridge enough to start a slow leak.
Bath Faucet Handle Types: Which One Do You Have?
Identifying your handle type up front prevents the dreaded “wrong part” return trip. Here’s a comparison of the most common bath faucet handle styles found in American homes:
| Handle Type | Common Brands | Difficulty | Typical Cost | Best For |
|---|---|---|---|---|
| Single lever | Moen, Delta, Kohler, Iviga | Easy | $15–$45 | Modern bathrooms, ADA-friendly grip |
| Cross handle (two-handle) | Pfister, Delta, American Standard | Easy | $20–$60 per pair | Traditional and transitional baths |
| Knob (round) | Older Delta, Glacier Bay, generic | Easy | $10–$30 | Budget remodels, rental units |
| Wrist blade | Commercial / ADA fixtures | Moderate | $35–$80 | Accessibility-focused homes, kids’ baths |
| Joystick / paddle | High-end European brands | Moderate | $60–$150 | Designer and luxury renovations |
If you’re using this handle swap as an opportunity to also refresh the look, the finish you choose matters as much as the shape. Brushed nickel hides water spots best, polished chrome shows them most, and matte black is currently the highest-conversion finish in our 2026 sales data. For a deeper finish discussion, see our analysis of matte black finish in 2026 and our companion piece on whether brushed nickel is out of style in 2026.
Common Mistakes to Avoid
After fielding thousands of customer service tickets at Iviga, we’ve seen every possible way this 20-minute job can go sideways. Here are the top five mistakes to dodge:
- Buying a “universal” handle that isn’t truly universal. The broach pattern is brand-specific. Always match by manufacturer part number.
- Over-tightening the set screw. A stripped set screw means the next person to service the faucet will have to drill it out. Snug, not torqued.
- Skipping the grease. A dry stem will be a stuck stem in 3–5 years. The 10 seconds of greasing saves the next homeowner an hour.
- Forcing a stuck handle with channel-lock pliers. You’ll scar the finish and likely crack the handle. Patience with vinegar and a proper puller wins every time.
- Forgetting the “off” reference mark. An incorrectly-oriented handle that puts hot at the 9 o’clock position is a daily annoyance — and a scald hazard for kids.
Speaking of kids — if this faucet serves a child’s bathroom, a handle swap is a great moment to think about safety. We recommend reviewing our parent’s guide on how to child-proof a faucet while you have the handle off.
When to Call a Plumber Instead
This DIY is genuinely easy — but there are a handful of situations where you should put down the Allen wrench and pick up the phone:
- The stem itself is broken, bent, or spinning freely.
- You see water seeping from behind the escutcheon (in-wall leak).
- The valve body is corroded or showing white mineral “salt” rings.
- Your home has galvanized supply lines that may shatter if shutoff valves are turned for the first time in years.
- You’ve already replaced the cartridge once and the handle is still wobbling.
In any of these cases, the underlying issue is no longer cosmetic — it’s a plumbing repair, and the cost of a $150 service call is dramatically less than the cost of water damage from a botched valve job.
Maintenance Tips to Make Your New Handle Last
A new handle is a clean slate. Protect it with these habits:
- Wipe it dry after every bath to prevent mineral buildup on the broach.
- Clean only with mild soap and water — never abrasives, never ammonia-based cleaners.
- Re-grease the stem every 3–5 years (pull the handle, dab silicone grease, reinstall).
- Tighten the set screw every 12 months — vibration from daily use slowly backs it out.
- Address drips immediately. A leaky valve puts constant vibration through the handle and accelerates wear.
For more on protecting the visible finish of your new handle, our guide on how to protect faucet finishes and keep them looking new covers the do’s and don’ts of cleaning products, polishing cloths, and seasonal maintenance.
Iviga Replacement Handles: Built to Last
All Iviga bath faucet handles are forged from solid brass with a PVD-applied finish that’s independently tested to ASTM B117 salt-spray standards (1,000+ hours) and meets NSF/ANSI 61 lead-free requirements. Every handle ships with a lifetime limited warranty against finish defects and a 5-year warranty on functional hardware. Our universal-broach handles are compatible with most Moen-, Delta-, and Pfister-pattern stems, and detailed compatibility charts are available on every product page.
FAQ
Do I need to turn off the water to replace a bath faucet handle?
Not strictly — the cartridge stem stays sealed when you remove just the handle. But shutting off the main supply (or local tub shutoffs if present) takes 30 seconds and protects you from a soaking if the stem gets bumped or if the cartridge is already failing.
How do I know which replacement handle to buy?
Identify the faucet’s brand and model, then look up the parts diagram on the manufacturer’s website. If the faucet is unbranded or you can’t find the model, remove the handle first and photograph the stem broach pattern — most parts counters can match it visually.
Why won’t my old bath faucet handle come off?
Mineral buildup (calcium and lime) bonds the handle to the stem over time. Wrap a hot vinegar-soaked rag around the base for 10–15 minutes, then wiggle gently while pulling straight out. A handle puller tool (about $15) is the safe finishing move if it still resists.
Can I replace a two-handle bath faucet with a single-lever model?
Not by swapping handles alone — the valve bodies are different. You’d need to cut into the wall and replace the entire rough-in valve, which is a project for a licensed plumber. A handle-only swap stays within the same valve type.
How long should a bath faucet handle last?
A quality solid-brass handle with a PVD finish should last 15–25 years before showing wear in high-touch spots. Plastic and low-grade zinc handles often crack at the set screw within 5–8 years, especially in hard-water regions.
What if my new handle wobbles after installation?
Usually one of three things: the set screw isn’t tight enough, the stem splines are worn (visible as rounded edges), or there’s still mineral debris in the broach. Pull the handle, clean both surfaces, inspect the stem, and try again. If the stem itself is stripped, you’ll need to replace the cartridge.
Is it safe to install a handle in a different finish than my spout?
Aesthetically, mixing finishes is a 2026 design trend — matte black handles on a brushed nickel spout, for example. Functionally, there’s zero issue. Just confirm both pieces use compatible cleaning methods so you don’t accidentally damage one while cleaning the other.
About the Author
This guide was written by the Iviga product education team, with technical review by our in-house master plumber (32 years field experience, licensed in three states). Iviga has manufactured bath and kitchen faucets since 2011, ships from U.S. warehouses, and backs every handle and cartridge component with an industry-leading warranty. All replacement parts referenced in this article are independently tested for lead content, salt-spray corrosion resistance, and torque-cycle durability before they reach our customers.